
When young businesses set out on the journey of selling on Amazon, they tend to overlook what this entails. Many of them believe that they will start selling as soon as they showcase their products on their Stores. However, there is a series of factors that determine a company’s success on the platform. This is also known as Retail Readiness.
Certainly, there’s more to brand positioning and successful selling than spending tons of money on advertising. If Amazon doesn’t consider your product as “retail-ready”, any advertising strategy that you are currently using to drive traffic to your page would have been in vain.
Do you know if your products are retail ready?
Amazon Retail Readiness Checklist
The following list of product features, content details, and shipping programs will help you determine whether your products are ready to be sold on Amazon or not.
We will cover these important elements:
A. Product Title Length Requirements
B. Product Description and Bullet Points
C. Product Images
D. A+ Content (previously “Enhanced Brand Content”)
E. Product Feedback Rating
F. Inventory Status
A. Product Title Length Requirements
Keep your title simple and to the point. Although the length of titles is determined by the product category, generally, Amazon allows 200 characters; however, aim for a maximum of 80 characters to ensure a positive customer experience. Less is more; the longer your title is, the quicker you’ll lose your customers’ interest.
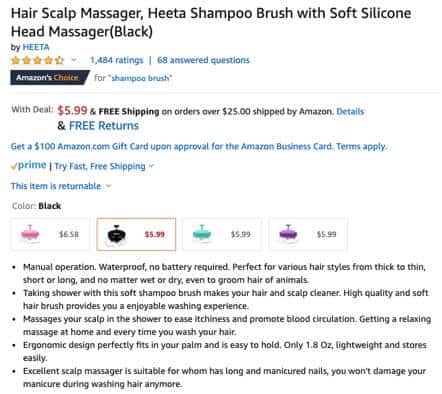
Title Requirements
Take the following criteria into consideration when writing the titles for your products:
- They should be concise.
- If your brand doesn’t have a name, enter the word “Generic” in the Brand Name field.
- Do not exceed 200 characters (including spaces).
- Don’t use ALL CAPS. Just capitalize the first letter of each word except for prepositions (in, on, over, with), conjunctions (and, or, for), or articles (the, a, an).
- Make sure they don’t contain promotional phrases like “free shipping”, “Hot Item”, “Best Seller”, “100% quality guaranteed”, or your merchant name.
- Special characters such as ~ ! * $ ? _ ~ { } # < > | * ; ^ ¬ ¦ are not allowed. However, they can include necessary punctuation, like hyphens (-), forward slashes (/), commas (,), ampersands (&), and periods (.).
- Titles must describe the nature of your product. For example: “hiking boots” or “umbrella”.
- You are not allowed to use non-language ASCII characters such as Æ, ©, or ®.
- You can abbreviate measurements, such as “cm”, “oz”, “in”, and “kg”.
- Use numerals instead of words. i.e. “2” instead of “two”
- Size and color variations should be included in titles for child ASINs, not the main title. The title for the selected child ASIN will appear once the ASIN is added to the customer’s cart.
For example:
- Parent: Crocs Beach Clog
- Child: Crocs Beach Clog, Lime Green, Men’s Size 8-9
Note: The title requirements above are the same across all fulfillment options: Fulfillment by Amazon (FBA), Seller Fulfilled Prime (SFP), and Merchant Fulfillment Network (MFN).
Failure to comply with these requirements may cause a product to be suppressed from Amazon search results. If you want to know if any of your listings have been suppressed, go to the Manage Inventory page, and click Suppressed.
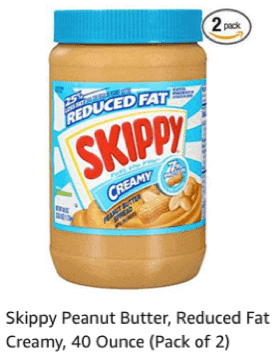
Product Title Example
B. Product Descriptions and Bullet Points
Help your customers make educated purchasing decisions with the right product description. Here are some suggestions:
- Keep your description short, friendly, and honest.
- There is a maximum length of 2000 characters allowed, but try to clock it in under 500. Make sure to add keywords.
- Use bullet points to highlight the benefits of your product and its unique properties, and also let your customers know if it has any limitations.
- Don’t mention competitors.
- The Description can contain spaces, but it cannot contain a carriage return (#0D), a line break (#0A), or a tab (#09).
- Check spelling and grammar before submitting.
This is the general structure that you should follow when describing your product into bullet points:
- Overall synopsis of your product
- Material type (Is assembly required?)
- Major feature(s)
- Minor feature(s)
- Warranty
See Product Detail Page Rules to learn more about what kinds of details should and should not be included.
C. Product Images
You would have to send several images of the same product so that Amazon can determine which ones best represent the features you are mentioning in your description. It can take up to 24 hours to get a response from Amazon about the eligibility of your images. Keep in mind that Amazon uses complex image ranking technology to determine display images.
These are some of the most representative general image standards:
- Your images must match the product title.
- The product and all its features must be clearly visible.
- MAIN images must be professional photographs of the actual product and they should have a pure white background.
- Graphics, illustrations, mockups, placeholders, props that might confuse the customer, text that is not part of the product, Amazon logos, watermarks, or inset images are not allowed.
- The minimum size for images should be 1,000 pixels or larger in either height or width.
- The smallest your file can be is 500 pixels on its longest side.
- Images must not exceed 10,000 pixels on the longest side.
- Amazon accepts JPEG (.jpg), TIFF (.tif) or GIF (.gif) file formats, but JPEG is preferred.
- Amazon servers do not support animated gifs.
- Images must not contain: nudity or be sexually suggestive, models that are sitting, kneeling, leaning or lying down (models must be standing), images of kids and baby underwear or swimwear that have been photographed on a model.
- Product images should not include any Amazon logos or trademarks, or variations, modifications or anything confusingly similar to Amazon’s logos and trademarks.
- Product images should not be blurry, pixelated, or jagged edges.
- The product should occupy less than 85% of a frame on the limiting dimension of the longest side.
This is how you can add images to an existing listing:
- Under Inventory, select Manage Inventory.
- Click the arrows on the Edit button and choose Manage Images from the list.
- Add images.
- Click Save, and Finish.
Learn more about adding product images or image requirements. You will find a comprehensive list of all Amazon’s image standards specific to your product category in the corresponding category style guides. For instructions on adding images, see Adding Product Images.
D. A+ Content (previously “Enhanced Brand Content”)
Recently, Amazon replaced its Seller Central feature “Enhanced Brand Content (EBC)” with A+ Content Manager. This new tool, available on both Vendor Central and Seller Central, allows you to modify your listings by adding rich content, a unique brand story, enhanced images, and text placements to your A+ Detail Pages. This tool can potentially drive more sales and conversion and help you reduce product returns.
This feature is only available to Professional sellers who have been approved as brand owners through the Amazon Brand Registry process. (If you don’t see A+ Content on the drop-down, you’re not a brand owner.)
Creating A+ content is easier in comparison to EBC.
Bear in mind that A+ Content is a tool that functions as an asset that can help you in your conversion. Therefore, even Amazon suggests that you should combine it with other programs such as ads, deals, or coupons to help you get better results.
How to Create A+ Content on Seller Central?
Creating A+ Content is pretty simple.
- Log in to your Seller Central account.
- Click on Advertising.
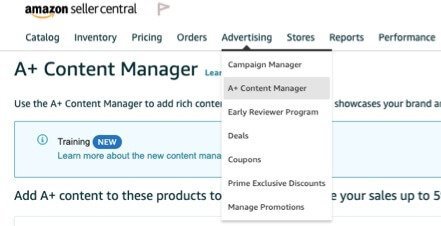
- In the drop-down menu, click on “A+ Content Manager”.
- After clicking the A+ option, you will be directed to choose the ASIN of the product that you want to use for the A+ listing.
- Select the template for your listing.
- Upload the images and content.
- Wait for approval.
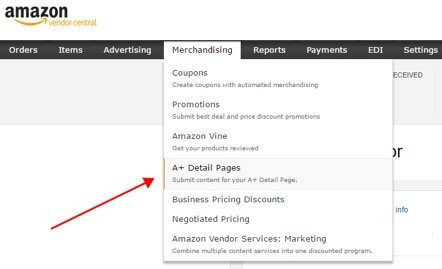
On the Vendor Central portal, this feature can be found under “Merchandising”.
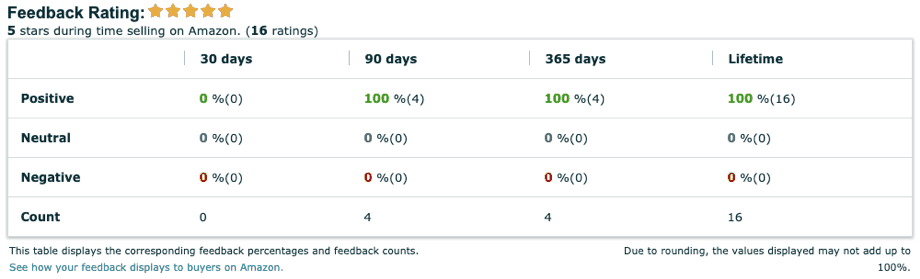
E. Product Feedback Rating
One of the first things that customers can see when they search for your products is the Product Feedback Rating. Buyer satisfaction is a business growth indicator, and your Rating represents the quality of your service. If you boast a high Rating, most likely you will have repeated purchases from your customers. A high rating is essential to increase Amazon conversion rates. In fact, if you fall below 4 stars, your overall conversion rate will plunge.
Do all you can do to ensure that you get more 4, and especially 5-star ratings, with excellent customer service and excellent products. Then you can protect your reputation and easily increase Amazon conversion rates.
Asking for honest reviews is totally safe.
You can use the Feedback Manager to track buyer satisfaction with your service.
This tool allows you to view:
- short- and long-term metrics
- detailed feedback entries (including buyer e-mails and Order Ids)
F. Inventory Status
Sellers and Vendors should always keep track of their inventory status. Remember that, in order to win the Buy Box, you need to ensure your product is in stock on your Product Detail Page.
Sellers, with Professional selling accounts, can download up to 4 Inventory Reports per day; as long as they have more than 50,000 open listings. If you have more than 500,000 listings, you are not allowed to request more than one inventory report per day.
Always compare your Amazon orders and inventory reports to your own inventory records to avoid any unpleasant surprises.
What do these reports reflect?
This report provides the following information of each of your current offers:
- SKU
- Price
- Quantity
- ASIN
Follow these steps to request and download an inventory report:
- Go to Inventory.
- Select Inventory Reports.
- Select the report type from the drop-down menu. See the list of report types below.
- Click the Request Report button. Reports generally take 15 to 45 minutes to generate. You can return to this page later to pick up your completed report.
- Under Check Report Status & Download, when the report status is “Ready”, click the Download button.
- Save the file to your local computer in text (tab-delimited, *.txt) format.
- Open the report in a spreadsheet or database program, such as Microsoft Excel or Microsoft Access.
Source: https://sellercentral.amazon.com/gp/help/G561
Learn about how you can Read an Inventory Report here.
We hope this checklist gives you a clearer idea of all the factors that play an important role in Amazon’s Retail Readiness. At the end of the day, following all the suggestions above could lead you to win the Buy Box, and achieve the success you’ve always wanted.
Contact AMZ Advisers today if you need help creating better content for your Amazon Seller Central and Vendor Central listings.


