Yes, users under 25 years old are saying goodbye to Facebook. But audiences over 55 years old are growing strong on the platform. That’s a very profitable demographic for sellers.
Plus, Facebook still has almost 2.9 billion monthly active users, as of Q2 2022. So, there’s still ample audiences to sell to, right on Facebook.
Now, sales on Facebook is not a new trend. The platform offers many features to help sellers engage with and convert customers.
However, not all brands understand clearly how to start a Facebook business. That’s why we’ve prepared this quick guide for you.
So, let’s find out how to sell on Facebook, and how the platform can help your eCommerce success.
Select Your Facebook Selling Model
All you need to start selling on Facebook is a user account. Sellers should also set up a business account. This will grant them access to every selling tool available for Facebook and Instagram.
Once your account is ready, there are three ways to start selling on Facebook. These are Facebook Buy & Sell groups, Facebook Marketplace, and Facebook Shops.
Facebook Marketplace
Think of Facebook Marketplace as eBay. It’s open for all users and businesses to buy and sell items.
Facebook Marketplace dates back to 2016. It helps connect buyers with sellers on the platform and negotiate sales.

Here’s how you can make use of Facebook Marketplace:
- Select Marketplace from your Facebook feed.
- Click on Create New Listing, and then on Item For Sale.
- Upload product info and photos to prepare your listings.
- Set a price. You can enter ‘0’ if you’d like to offer a free item.
- Review the listing details and click on Publish.
Note that local sales do not incur any sales fee from Facebook. Plus, the marketplace allows for US shipping for specific categories, at a 5% fee of the sales price.
But Marketplaces is not a proper eCommerce platform. There are no carts or calculators. Everything is negotiated by sellers and customers.
Facebook Buy & Sell
These are groups that allow members to buy and sell items on Facebook. To do so, the group should have a buy and sell feature enabled by the admin.

Group members can start selling by following these steps:
- Select the group from your Facebook feed.
- Click on the Sell Something button.
- Enter the product details. This includes, title, description, images and pricing.
- Click on Next and select your target audience.
- Review your listing and post it in the group.
You can always attract a wider audience by sharing the post in other buy & sell groups. Or you can set up a Facebook Marketplace listing.
The main caveat of this model is that you’ll need to manage each listing separately.
Facebook Shops
The previous selling models are best suited for regular Facebook users. That’s not the case for Facebook Shops.
Each shop works as a hub where sellers can showcase their catalog, both on Facebook and Instagram. It also gives access to features like chats, live streams and product tags.

There’s even the chance to include a checkout option, or to redirect users into your main website.
Facebook Shop also features shipping options across the US. As with the marketplaces, Facebook will collect a 5% fee for each shipment.
How to Sell on Facebook Shops
Brands can sell on Facebook using any of the previous models. But we believe pro merchants can benefit more from setting up a Facebook Shop.
Let’s take a more detailed look into Facebook Shops, since that’s the best option for eCommerce sellers.
Comply with Facebook’s Policies
First things first; you can’t start selling without knowing Facebook’s terms and policies for sellers.
The platform holds many rules on how brands should approach selling on Facebook or Instagram. Plus, you should also be aware of the items you’re not allowed to sell. For example:
- Digital media.
- Animals or land products.
- Currency or financial instruments.
- Dangerous goods and hazardous materials.
- Ingestible food supplements.
- Discriminatory, violent or hateful goods.
Make sure you review Facebook’s Commerce Terms and Policies, to see if your products are a fit for Facebook.
Also, check the Seller Agreement, and the platform’s Community Standards before setting up shop on Facebook.
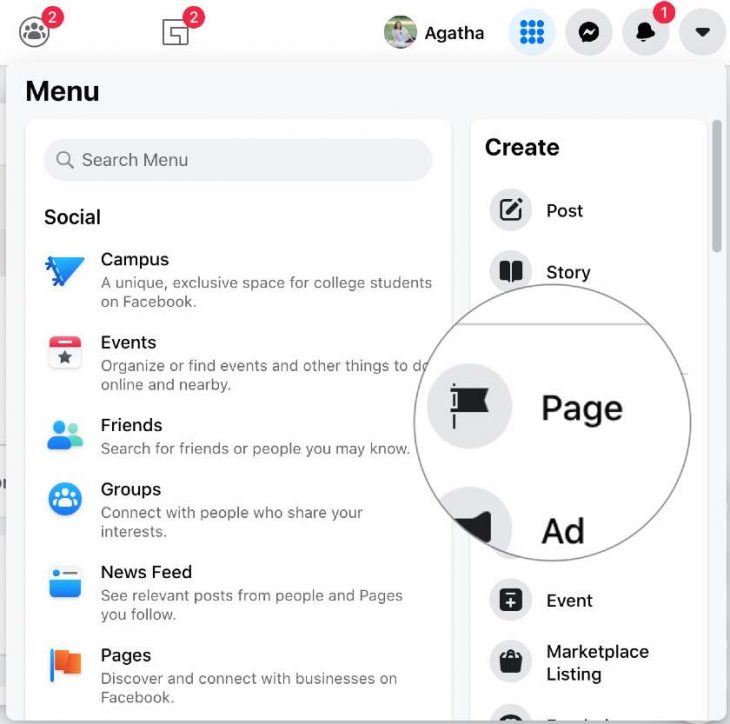
Set Up a Facebook Page
The second step is to create a Facebook page. This is open for businesses or public figures. Its goal is to make it easy for customers to find you, and know more about you.
Think of it as a storefront. You’ll need to submit a name, descriptions, business category, and branding images.
A Facebook page can also give you access to the following tools:
- Create ad posts, which you can publish on Instagram and Facebook.
- Set a spending budget for your marketing campaigns.
- Research and communicate with unique target audiences.
Facebook Commerce Manager
The Commerce Manager allows you to set up a shop within your Facebook page. It’s also the tool you’ll use to connect your main eCommerce platform with Facebook.
Follow these steps to set up the Commerce Manager
- Log in here.
- Select Create a Shop or Create a catalog depending on your sale offers.
- Click on Get Started and set up a checkout method.

US-sellers can set a checkout straight from Facebook. But the best option may be to redirect shoppers to your website.
With the latter option, users will browse your offers on Facebook. But when they choose to buy something, they’ll complete the process on your own website.
A third option is Direct Message Checkout. This means users will get in touch with you to discuss payment and shipment details. It’s a unique approach, which favors customer delight.
Once you set up your checkout details, you can finish setting up the Commerce Manager:
- Add your Facebook shop to your Facebook page.
- Connect the shop with your Facebook Business account.
- Include shipping and return details for your shop. This includes costs and delivery estimates.
- Submit your business, banking and tax details to cover fees and payout obligations.
- Preview your Facebook shop and click on Finish setup.
Upload Your Listings
Now you can start uploading product listing using a Facebook catalog. This is where you’ll manage all item details. For example: titles, descriptions, images, stock, and pricing.
You can access the catalog by selecting the Catalog Manager tools. You’ll find this under the catalog tab in the Commerce Manager menu.

Sellers can choose to upload products manually, or in bulk. For the latter options, you’ll need to upload a spreadsheet that includes all your products’ details.
Once your catalog is uploaded and optimized, you can start advertising and selling on Facebook!
Final Thoughts
The best sellers go where the customers are. So, Facebook is one of the best places online to find new sales leads!
But word to the wise: Facebook is a great marketing tool, but it is no replacement for a fully-fledged eCommerce store.
The best strategy is to integrate your main online store with Facebook. Such a strategy will help you drive more customers into your webpage.
At the same time, you’ll also gain new followers. So, selling on Facebook can be a great way to drive brand awareness, and to increase revenue on and off social media.
In the end, you want to make it easy for customers to find you and trust in your products. That’s what Facebook excels at.
Author

Esteban Muñoz is a content writer at AMZ Advisers, with several years’ experience in digital marketing and e-commerce. Esteban and the AMZ Advisers team have been able to achieve incredible growth on Amazon for their clients by optimizing and managing their accounts, and creating in-depth content marketing strategies.


